Saturday, April 23, 2011

(PM-05) Cretan Archers - Part 1


This is a bit of a quickie project. It's part of my experiments with "dipping." I've posted a bit abour my first experiment at my regular blog.

As a "quickie" (and since I am very short of time these days) I don't have a step by step set of photos, but since I was painting in flat colors, I don't think that matters as much as with the (mainly) layering & wash process I normally use.

Apologizes for the poor photos, the only camera I had on me was my phone. I will take better photos of the completed figures, after spraying a matte finish, in the next few days.

The figures are 16 Cretan Archers from Black Tree Design. I am painting them now because of the Macedonian/Successor project I am finally working on. But they will see use in other roles and appropriate periods as well. They're nice, cleanly sculpted and cast figures (though there are pronounced mould lines on the hats) and should be simple to work on.

So here is the first photo, showing the first six steps. All done in flat colors.


Step One: Paint flesh. 15 min.
Step Two: Paint beards & hats. 12 min.
Step Three. Paint tunics. 28 min.
Step Four. Paint leather/quiver. 10 min.
Step Five. Paint bows. 6 min.
Step Six. Paint arrow flights. 4 min.

So that's a total of 75 minutes so far, or a little under 5 minutes per figure.


Now for the second phase of painting, and a bit more experimenting.


These were all hit with the big "dip" wash. I brush it all on, I don't actually dip the figures as some people apparently do. But in this case I tried two different washes.

On the left are 8 figures washed with the usual Minwax Antique Walnut. On the right are 8 figures washed with my own "Substance D" recipe of Future, anti-shine medium, a bit of water and some Ceramcoat Dark Burnt Umber.

Each set of 8 figures took 6 minutes of brushing, plus a little bit of dabbing off of the pooled wash in places. (I did miss a few pooled spots!) So that brings the time up to...,

Total Time: 87 min.

That's just under 5.5 min. per figure! Certainly beats the 17-21 min. per figure rate for some of the previous infantry, and even the 12 min. per figure of the simple knights. Admittedly, these were also very simple figures Although I loved the way these washes turned out on the Carthaginians on which I previously experimented, I'm still not convinced of how well they work on figures with large flowing drapery, as these have. I will see how they look after they dry overnight and get a matte varnish, though.

Previous blog entries:
http://zerotwentythree.blogspot.com/2011/04/taking-plunge-with-dipping.html
http://zerotwentythree.blogspot.com/2011/04/dipping-experiment-continued.html

Sunday, March 28, 2010

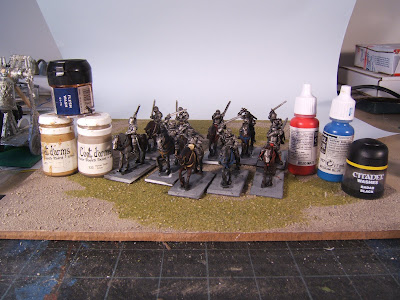
(PM04) Wars of the Roses Cavalry - Part 2


Step Four. I painted a base coat on all the saddles and horse equipment. I used four different colors, two shades of brown, red, and blue.

Step Four: 32 min.
Total: 78 min.


Step Five. Highlights and/or washes added to the saddles and equipment.

Step Five: 16 min.
Total: 94 min.


Step Six. Due to poor planning, I should have painted the belts, scabbards, etc. on the knights before washing the entire figure with black. So now I went back and painted those portions brown, then washed them with black as a separate step. The wash was only a couple minutes, but that was a redundant couple of minutes.

Step Six: 10 min.
Total: 104 min.


Step Seven. This is several steps rolled into one. First I went back and put another layer of black wash on all of the horses lower legs, tails, manes, and around the mouth area on some of them.

Then I added the dappled spots to the grey horses. I did this with quick & irregular spots of thinned out grey paint. I sometimes put a few spots down, then lightly push my finger onto the paint if it's a bit to heavy and/or too "contrasty." My goal is usually to try to make the dappled spots look subtle. I do usually go back and add a few heavier (more opaque) spots with un-thinned paint, for variety.

Finally I added some "socks" to some of the brown horses using first antique white, then a straight white.


Step Seven: 12 min.
Total: 116 min.


Step Eight. Final step was all the gold and/or brass bits. Instead of using a base + wash + highlight like I frequently do, I just did a base of GW "Tin Bits" followed by a highlight of gold. I don't think it looks as good as the usual method, but the areas I was painting were so small they're hard to even notice in the first place. So the shortcut had little (if any) visual effect.

Step Eight: 10 min.
Total: 126 min.


So that's the final total. 126 minutes, divided by 10 figures is about 12.6 minutes per figure. Not bad, though I've got to admit they're not the best figures I've done. But they're OK. I think I took a few too many shortcuts.

Sunday, March 21, 2010

(PM04) Wars of the Roses Cavalry - Part 1

I had to take a bit of a break from the Paint Machine for a bit. I was trying to get more Romans & Germans done for my demo events. In addition to not having the extra time required to photograph and post to the blog, I've already done one project on Romans and didn't feel the need to repeat. ;)

While I was at Cold Wars I picked up a number of new things, in addition to the backlog of unpainted stuff I've already got. One thing caught my attention as a possible good subject for a quick project.

I'm not normally a fan of Old Glory's cavalry. I've had their figure from various ranges (Huns, Italian Wars gendarmes and mounted crossbowmen, Goths, etc.) and haven't been terribly impressed. Their Sarmation cataphracts were OK. I just don't normally care for their horses, which tend to be a bit smaller and thinner than other ranges.

But last weekend I was looking at packs from the Wars of the Roses range (still labeled as Revenge miniatures) and was impressed enough to pick up a couple bags, both on unarmoured horses. I don't know if the entire range is of similar quality, I'd like to see the armoured/barded horses to compare. Tin can riders on horses should be a quick paint-up, right?


Step One: Easy enough. Paint all the riders completely with GW Chainmail paint (or other suitable silver color.)

Step One: 14 min.
Total: 14 min.


Step Two. I painted the horses in four different base colors. Two were different browns (Ral Partha African and GW Dark Flesh), Americana Slate Grey, and then one horse was painted using the Slate Grey with some black mixed in. (This last one will become a subtly highlighted black colored horse, after the wash in the next step.)


Step Two: 22 min.
Total: 36 min.


Step Three. It was probably a bit soon for this step. I should have painted some of the details (leather, etc.) first. I was just anxious to get some highlights & shading on the figures and jumped ahead to quickly.

On 9 of the figures I slapped a healthy wash of GW Badab Black wash over the entire figure. As an experiment, I used my own mix of black paint, Future floor polish, water, and Vallejo matte medium on one figure (the back row, rightmost figure.)

My wash is still very glossy and much thinner. I will work on this a bit. Maybe some thicker matte medium would help. I may look into that at the art supply store.

Step Three: 12 min.
Total: 46 min.

Saturday, February 6, 2010

Stuart's Workbench Link

I spotted the following Step by Step Painting Guide on a blog I've recently started following, "Stuart's Workbench."

http://stuartsworkbench.blogspot.com/2010/02/step-by-step-painting-guide.html


It's a great guide, and I'm particularly fond of the subject.


As for my own projects, I'm painting away trying to get twenty-three things done at once, so for the moment I'm not taking time out for a new Paint Machine project. But I probably start a new one up in the next few weeks.

Sunday, January 10, 2010

(PM03) Ancient Spanish Scutarii - Part 5

Sorry, some of today's photos have turned out a bit blurry. I'm not sure what happened.


Step Thirteen. Painted trim on the tunics and the shield faces dark red.

Step Thirteen: 39 min.
Total: 353 min.


Step Fourteen. Highlighted only the shield faces with the dark red mixed with just a little of bright red. The dark red is transluscent enough that when I painted it over the white tunics, it looked as if it was already highlighted, as the white portions showed through lightening the red in those areas.

Step Fourteen: 10 min.
Total: 363 min.


Step Fifteen. Another highlight on the shield faces. Mostly bright red, mixed with a small amount of the darker red. I did add some highlights to a few spots on the tunic trim.

Step Fifteen: 7 min.
Total: 370 min.


Step Sixteen. Base coat of black patterns on the shields. These are based on some of the ideas I've found in books and on photos of painted figures around the web. I went with large stylized graphics as opposed to smaller details. Also stuck with the red white & black for a bigger visual impact, and less cluttered look than my Gauls, for example. I figured the definitive historical proof is limited enough that I could just go with something that "feels" right & looks good and be happy with that.

Step Sixteen: 16 min.
Total: 387 min.


Step Seventeen. Highlighted the black areas with black mixed with just a small amount of grey

Step Seventeen: 17 min.
Total: 404 min.


Step Eighteen: White borders between the red & black on some of the shields. I went back and gave a quick highlight with titanium white on a few of the shields after this photo, but have added the time into this step for completeness.

Step Eighteen: 13 min.
Total: 417 min.


Step Nineteen. Decided to try a different base color for bronze pieces. This is Privateer Press' Ps "Brass Balls." Yes, really. I understand that its made by the same company that makes Coat d'Arms and the older GW paints. This is the only one I've used. It was a promotional freebie. I'm a bit unimpressed. The paint has serious separation issues, even with extensive shaking and the addition of an agitator bead to the paint. This causes some coverage problems, but even when it does well I'm closing & re-shaking the paint every few figures. Maybe the regular colors are better? I don't know.

Step Nineteen: 40 min.
Total: 457 min.


Step Twenty. Old GW Flesh Wash on the bronze bits. Slightly thinned with a bit of water.

Step Twenty: 13 min.
Total: 470 min.


Step Twentyone. GW Mithril Silver on the spear tips & sword blades.

Step Twentyone: 7 min.
Total: 477 min.


Step Twentytwo. This is actually two steps rolled into one, as I wanted to finish the figures and the photographing takes almost as long as the painting. The crests were painted with the dark red followed by a drybrushing of the light red.

Step Twentytwo: 13 min.
Total: 490 min.


Step Twentythree. Black wash on all the silver parts. I put the intermediate step of the crests between the silver and the wash so that the silver could dry completely. I hate having silver metalic flakes lift off into my brushes & other paints.

Step Twentythree: 3 min.
Total: 493 min.


Step Twentyfour. Sadly I couldn't end it on step 023. For the last step I used a lighter brown to add a lighter grain on all the wood of the spears and the standard.


Step Twentyfour: 8 min.
Total: 501 min.


Finished.

Total time was 501 minutes for 24 figures, giving a rate of 21 minutes per figure (rounded up.) That compares to 17 minutes per figure for the Romans. I thought I would end up with a much larger number, but in the end that's not a bad time. In fact, I feel a bit guilty for cutting a few corners when it started looking like it was taking forever.

After basing these guys up I will post photos at my "regular" blog.

Time to consider what to do for the next project!

Thursday, January 7, 2010

(PM03) Ancient Spanish Scutarii - Part 4


Step Ten. Final highlights of the white tunics. Not the best pic, but maybe in subsequent pics the difference between the two shades of white will be more apparent.

Step Ten: 14 min.
Total: 239 min.


Step Eleven. Brown basecoat on assorted leather & wood items. I went back with a second shade of brown and painted a few bits not done in the pic, but just rolled that into this time.

Step Eleven: 54 min.
Total: 293 min.


Step Twelve. Black wash on the brown leathery bits. Wood bits did not get the wash and will be lightlighted a bit with a lighter brown in a later step.

Step Twelve: 21 min.
Total: 314 min.


Still to do... shields, metal bits, helmet crests, and cloaks on five of the figures.

Wednesday, January 6, 2010

(PM03) Ancient Spanish Scutarii - Part 3


Step Six. Tidying up the mess made from painting the flesh. Again, this step seems like it takes way too long. The black helps give definition, especially against the planned light colored cloth. Maybe I should have skipped this. Or at least only hit a few vital spots.

Step Six: 47 min.
Total: 150 min.


Step Seven. Base coat cloth. I will be doing all the scutarii in light colors. Different shades of white, more or less. But I want some variation, so I will get there through various routes. I have a second group the same size as this one that I will paint later. So I will use two different methods on this group, then some others on the next group, and mix the two sets for more variety.

So for the next few steps, I will have the figures split into a left and right group, with a different color paint used on each.

Step Seven: 38 min.
Total: 188 min.


Step Eight. First highlight on cloth.

Step Eight: 23 min.
Total: 211 min.


Step Nine. Second highlight on cloth. The group on the left was highlighted with the first highlight color lightened further with a bit of white.

Step Nine: 14 min.
Total: 225 min.


The steps still seem to be taking too long and I am quickly approaching the 303 minutes I spent on the Romans. I have noticed that the Old Glory figures seem to take longer. I think the many small folds in the cloth & smaller details slow me down a little. Even then, I'm doing a bit of overbrushing on some of the cloth and it's not turning out as nice looking as my usual layering. The latter definitely works better on the more simplified style of the Crusader, as well as the Foundry and Wargames Factory figures I've done in the first two projects.